
Your Shopify theme shapes how customers see your brand, browse products, and move through your store. Although a theme provides the basic design, you can adjust its layout, colors, fonts, images, and page sections to match your business needs. If you want to understand how to customize Shopify theme settings without making unnecessary code changes, the Shopify theme editor is a good place to start. It lets you modify many parts of your storefront directly from your Shopify admin. For more advanced changes, you can use custom CSS, edit Liquid files, or work with a developer.
This guide explains how to customize a Shopify theme step by step, from preparing your theme and editing the homepage to improving product pages, navigation, and mobile usability.
What Is Shopify Theme Customization?
Shopify theme customization means changing the appearance, layout, and available features of your online store to suit your brand and customers. You can start with a few simple adjustments or make more advanced changes depending on what your business needs. For example, a clothing store might highlight size options, collection filters, and product photography. A Shopify beauty store might focus on ingredient details, product benefits, and customer reviews. A home decor store may need larger product images and room-based collection layouts.
Common Shopify theme customization tasks include:
- Updating your store logo, colors, and fonts.
- Changing the homepage layout and banner images.
- Adding, removing, or rearranging content sections.
- Improving product pages with useful information.
- Adjusting collection pages and product filters.
- Updating the header, navigation menu, and footer.
- Configuring cart settings and shopping features.
- Improving the mobile shopping experience.
- Adding custom styling or functionality when required.
The available options depend on your chosen theme. Many visual changes can be made without coding, while specialized layouts or features may require additional tools or development work.
What Should You Do Before Customizing a Shopify Theme?
Before making changes, prepare your theme so you can test the design and avoid unnecessary problems.
1. Duplicate Your Existing Theme
Create a backup before making significant changes, particularly if you plan to edit code or modify several templates. Follow these steps:
- Log in to your Shopify admin.
- Go to Online Store > Themes.
- Find the theme you want to customize.
- Open its actions menu.
- Select Duplicate, if available.
- Wait for the copied theme to appear in your theme library.
Make changes to the duplicate and preview the result before publishing it. Keep the original theme unchanged so you have a reference if something goes wrong.
2. Define the Changes You Need
Identify the parts of your store that need improvement before opening the editor. For example:
- Homepage: Improve the banner, featured collections, and promotional content.
- Product pages: Organize descriptions, images, variants, and product details.
- Collection pages: Improve product discovery and category organization.
- Navigation: Make important pages and collections easier to access.
- Cart: Review the layout and the information shown before checkout.
A clear list helps you focus on changes that serve a purpose rather than making random design adjustments.
3. Check Your Theme’s Features
Different best Shopify themes provide different customization options. Review the theme documentation and its available settings to understand what you can change without editing code. If the theme already includes a feature you need, configure it before installing another app or requesting custom development.
Customize Your Shopify Store Through the Theme Editor
Customizing your Shopify store is essential for creating a professional, user-friendly shopping experience. With Shopify’s built-in theme editor, you can modify your store’s layout, colors, typography, product pages, navigation, and other design elements without editing code.
For example, if you’re using the Nexus Beauty Shopify Theme , the theme editor allows you to build and customize your storefront through configurable sections, blocks, and theme settings.
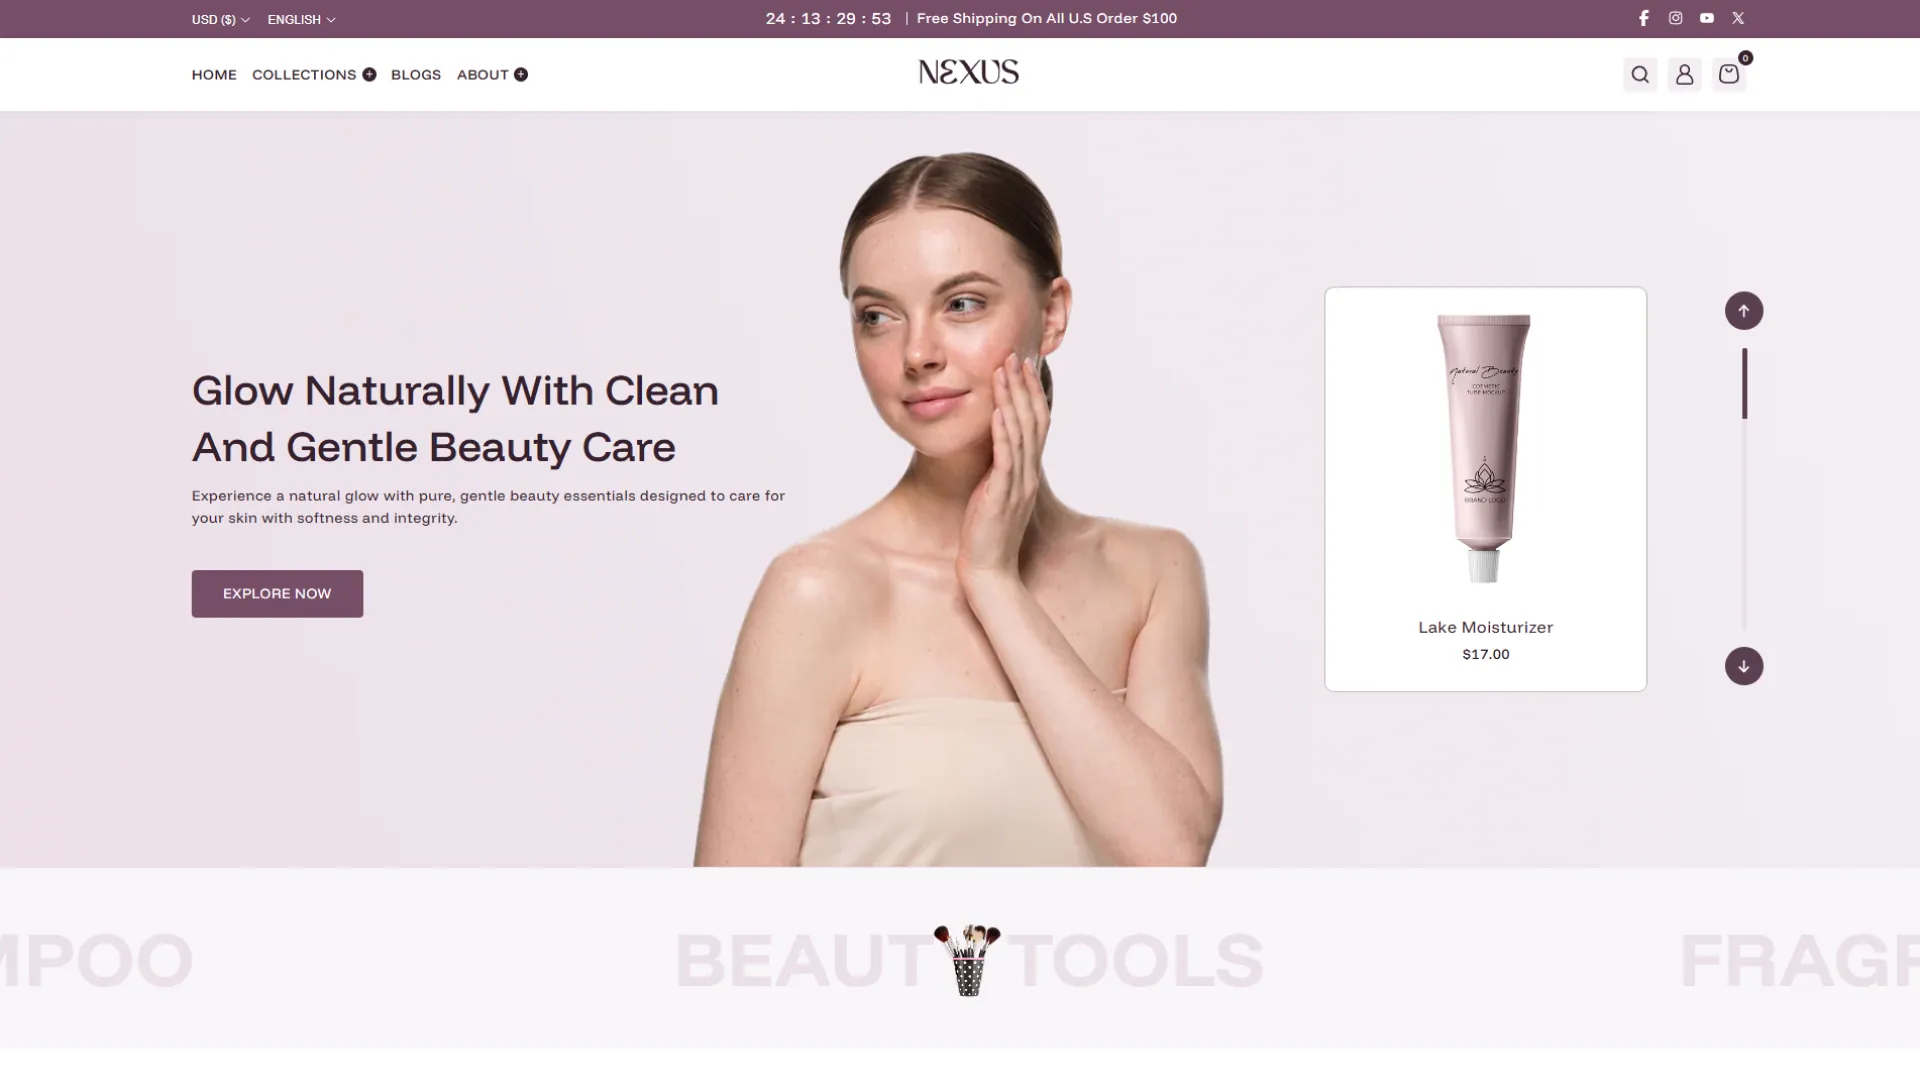
Step 1: Install and Access the Nexus Shopify Theme
Before customizing your storefront, make sure the Nexus theme is available in your Shopify store.
How to Access the Theme Editor
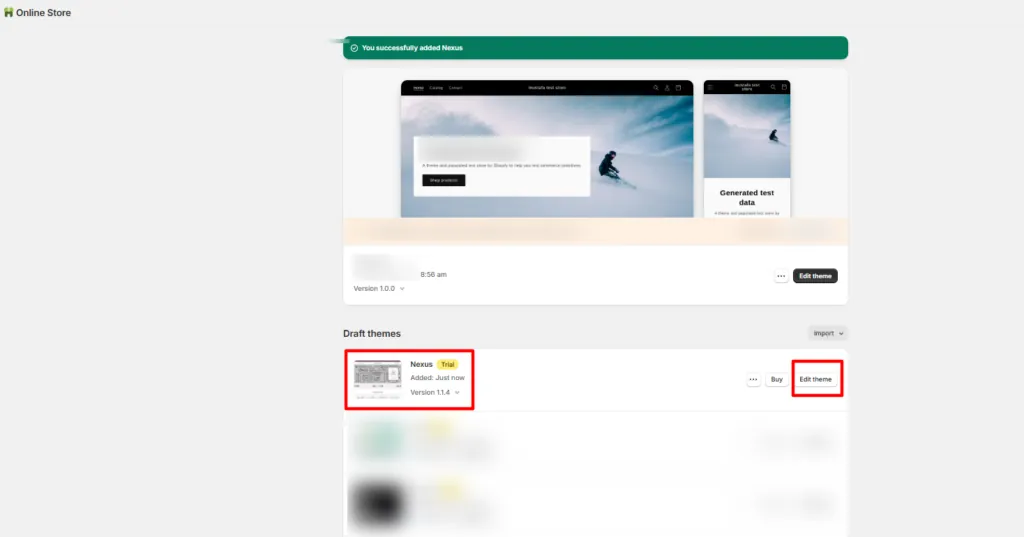
- Log in to your Shopify admin dashboard.
- Navigate to Online Store > Themes.
- Under the theme library or installed themes, locate the Nexus Shopify theme.
- Click Customize to open the Shopify theme editor.
- Wait for the editor to load your storefront preview and customization controls.
Step 2: Customize the Nexus Theme Homepage
Your homepage is often the first page customers visit. It should communicate your brand identity, highlight important products, and make shopping straightforward.
How to Customize Homepage Sections
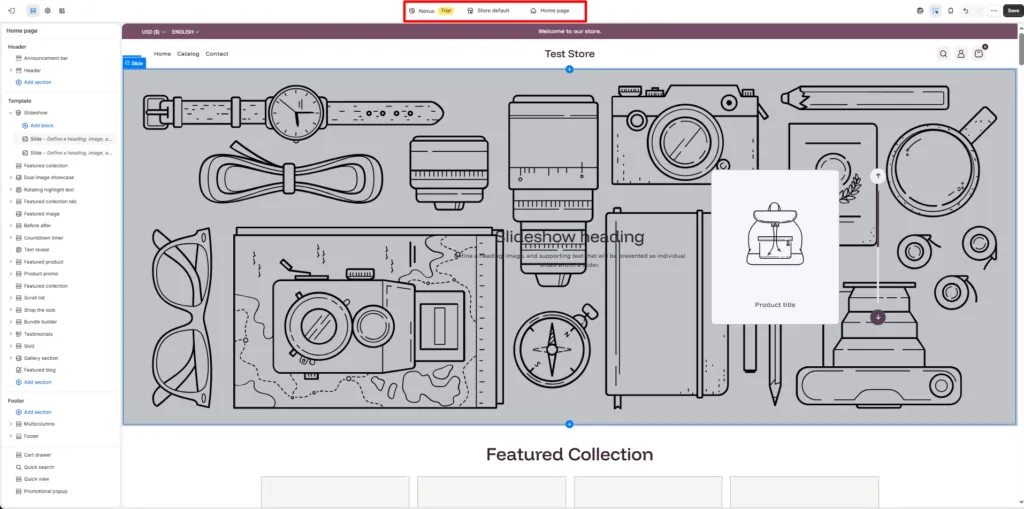
- Open the Nexus theme editor.
- Select Home page from the template selector.
- Review the existing sections in the left sidebar.
- Click a section to open its settings.
- Modify the available content, images, links, and layout options.
- Use Add section to insert another supported section.
- Drag sections into your preferred order.
- Click Save.
Step 3: Change Your Shopify Theme Colors and Typography
Colors help connect your storefront to your brand and make important interface elements easier to recognize.
How to Change Theme Colors
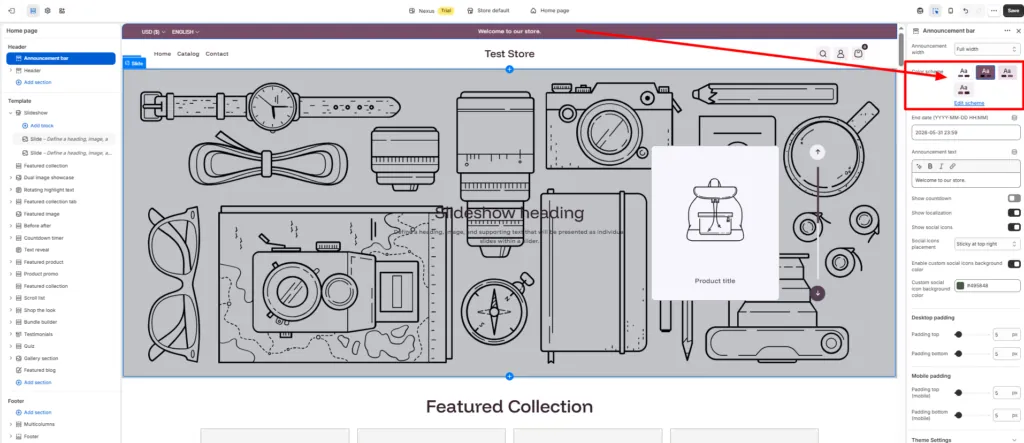
- Open the theme editor.
- Select Theme settings.
- Find the color or color scheme settings.
- Adjust the available background, text, accent, and button colors.
- Preview the changes across different sections.
- Save your updates.
Where supported, set up a consistent palette for headings, body text, links, buttons, and backgrounds. Check contrast carefully. Text should remain readable against its background, and important buttons should be easy to distinguish from surrounding content. Avoid using too many unrelated colors, as they can make the storefront look inconsistent.
How to Customize Typography
Navigate to Theme settings > Typography, where supported. Adjust the available heading and body font settings, including font family, size, weight, and scale. For a clean ecommerce design, use a clear visual hierarchy with readable body text and prominent headings. Avoid excessive font variations that make the storefront appear inconsistent.
Technical consideration: Fonts can affect page loading performance. Limit unnecessary font weights and use the theme’s built-in font controls rather than injecting multiple external font libraries.
Step 4: Customize the Header and Navigation Menu
The header helps customers find products, access their accounts, and reach the cart.
How to Edit the Header
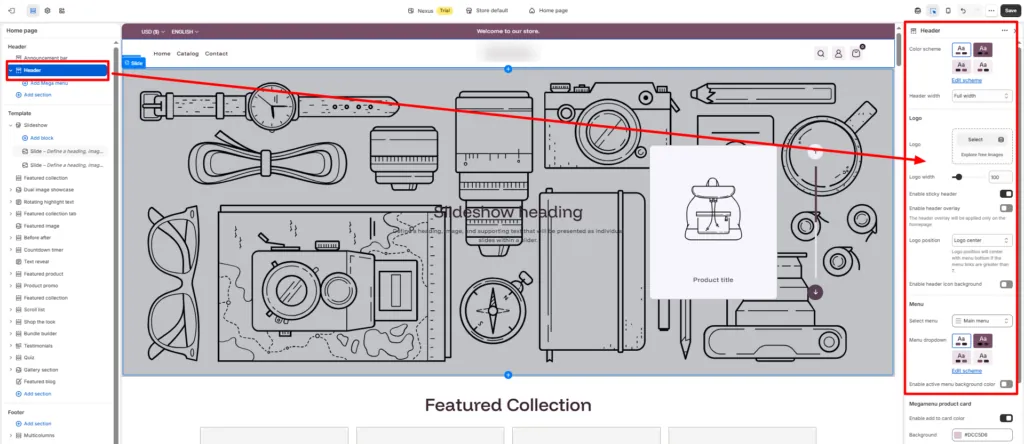
- Open the homepage in the theme editor.
- Select the Header section.
- Upload or select your store logo.
- Configure the logo width.
- Select the navigation menu assigned to the header.
- Configure sticky-header behavior, if supported.
- Review search, account, and cart icon settings.
- Save your changes.
How to Edit Navigation Links
Navigation links are managed separately from many theme layout settings.
- Go to Content > Menus in Shopify admin, or Online Store > Navigation if your admin uses that interface.
- Open your main menu.
- Add links to collections, products, pages, or other destinations.
- Organize nested menu items where needed.
- Save the menu.
- Return to the theme editor and verify that the correct menu is selected.
A useful navigation structure could include Shop All, New Arrivals, Bestsellers, Collections, About Us, and Contact.
If your Nexus version provides a mega menu, configure it using its documented section or block settings. Do not assume every Nexus installation supports the same mega-menu layout.
Step 5: Customize Product Pages in the Nexus Theme
Product pages are among the most important pages in your Shopify store because they provide the information customers need before purchasing.
How to Access Product Page Settings
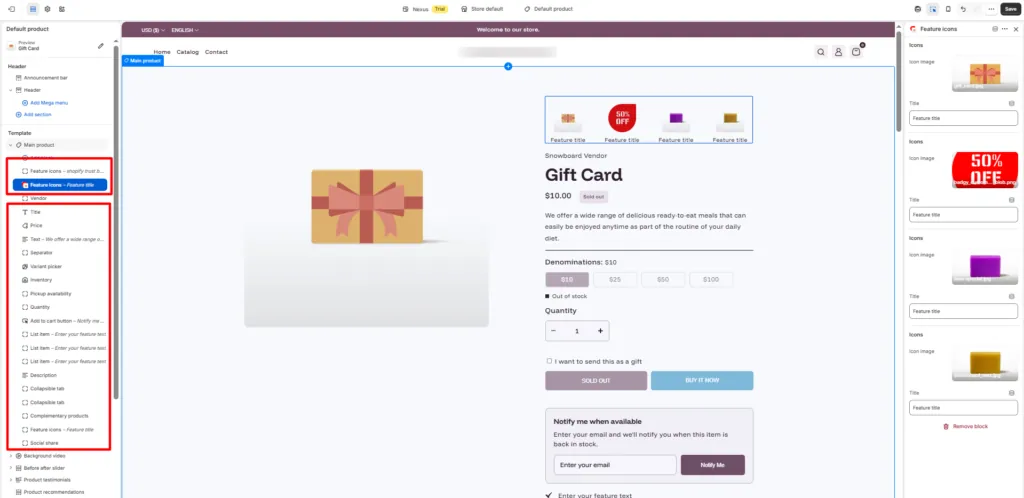
- Open the Nexus theme editor.
- Use the template selector to choose Products > Default product.
- Select the main product section.
- Review the available product information blocks.
- Rearrange, configure, or hide blocks as required.
- Preview the page using a product that contains images, variants, pricing, and descriptions.
- Save the template.
Step 6: Customize Collection Pages
Collection pages help shoppers browse related products and narrow their choices.
How to Customize a Collection Template
- Open the theme editor.
- Choose Collections > Default collection.
- Select the main collection section or product grid.
- Configure the available grid and layout settings.
- Enable sorting or filtering controls where supported.
- Configure collection image and description display.
- Preview on desktop and mobile.
- Save.
How to Configure Product Filters
Shopify’s Search & Discovery app can manage compatible storefront filters.
- Install or open Shopify Search & Discovery.
- Navigate to Filters.
- Add relevant filters, such as availability, price, product type, or supported metafields.
- Save the filter configuration.
- In the Nexus collection template, enable filtering if the theme exposes that setting.
- Test the filters on a populated collection.
Filters will only work as expected when product data is accurate and the theme supports the corresponding storefront filtering interface.
Step 7: Customize the Footer
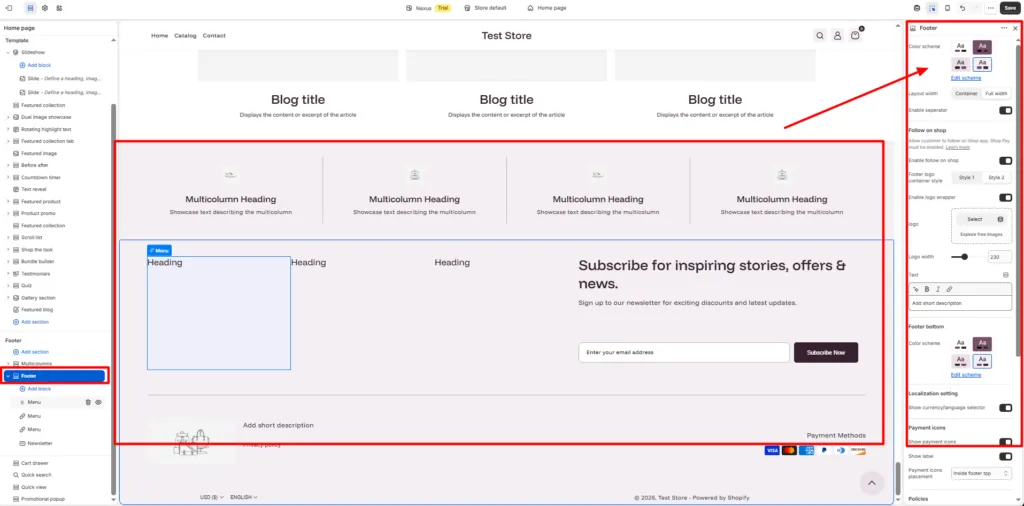
The footer should provide useful information without overwhelming visitors. Open the Footer section in the theme editor and configure the available settings. Add your important navigation menus, customer support links, contact information, newsletter signup, and social media links where supported.
Useful footer pages include Contact Us, About Us, Privacy Policy, Refund Policy, Shipping Policy, and Terms of Service. Shopify’s policy pages can be configured under Settings > Policies. Ensure footer links point to the actual published destinations.
Step 8: Customize the Nexus Slide-Out Cart and Cart Notes
The Nexus theme lists slide-out cart, sticky cart, cart notes, gift wrapping, and quick-buy functionality among its supported features.
How to Configure the Cart Experience
- Open Theme settings in the Nexus editor.
- Find the cart-related settings. Depending on the version, some controls may be in the cart template or header.
- Select the slide-out cart layout if that option is provided.
- Enable cart notes, gift wrapping, or other required features.
- Save the changes.
- Open the storefront preview and add a product to the cart.
- Verify that the cart opens correctly, displays the right subtotal, and allows quantity updates.
Step 9: Customize Promotional and Conversion Features
Nexus includes a range of merchandising and marketing capabilities, including promotional banners, countdown timers, product recommendations, quick view, and Shopify recently viewed products. To configure a feature:
- Select the appropriate page template.
- Look for its corresponding section, block, or theme setting.
- Add or enable the feature if available.
- Configure its content, products, display conditions, and design.
- Save and test the feature on the storefront.
For example, a promotional banner might contain a heading such as “Free Shipping on Orders Over $75,” with a link to your shipping policy. Make sure any advertised offer matches your actual Shopify shipping rates and discount conditions. For countdown timers, use genuine promotion end dates rather than automatically resetting artificial deadlines.
Step 10: Create Custom Product and Page Templates
Different products may require different layouts in a skincare Shopify stores. For example, a facial serum might need an ingredients list and usage instructions, while a moisturizer might benefit from sections highlighting its benefits, skin type compatibility, and application tips.
How to Create an Alternate Product Template
- Open the Nexus theme editor.
- Open the template selector.
- Select Products > Create template.
- Enter a descriptive name, such as skincare.
- Choose an existing product template as the starting point.
- Create the template.
- Add or rearrange the necessary sections and blocks.
- Save the template.
- Go to Products in Shopify admin.
- Open the relevant product and assign the new template in its theme template settings.
- Save the product.
Step 11: Add Advanced Customizations Using Custom Liquid
When the available editor settings are insufficient, some best Shopify themes provide a Custom Liquid section.
How to Implement Custom Liquid
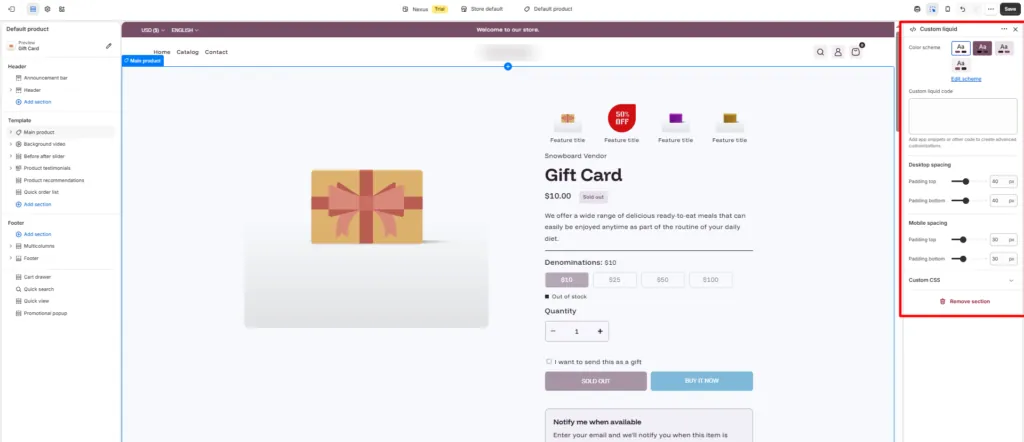
- Open the product template in the Nexus editor.
- Click Add section.
- Select Custom Liquid, if available.
- Paste the code.
- Save the template.
- Preview products with and without the metafield populated.
The conditional statement prevents the material label from appearing when no value exists.
For deeper customizations, use Edit code to work with Shopify’s Liquid, JSON templates, CSS, and JavaScript. Always test changes on a duplicate theme first.
Step 12: Optimize the Nexus Theme for Mobile Devices
A layout that looks attractive on desktop may not work well on smaller screens.
Mobile Optimization Process
- Open the theme editor.
- Switch to the mobile preview.
- Review the header and navigation.
- Check hero banner cropping and text visibility.
- Inspect product grid spacing and card layouts.
- Confirm variant selectors and cart buttons are usable.
- Test collection filters and sorting controls.
- Review footer spacing and newsletter forms.
For more accurate testing, open the storefront preview on a physical mobile device.
Step 13: Configure SEO Settings
Theme customization should also support search engine visibility.
How to Update Page Metadata
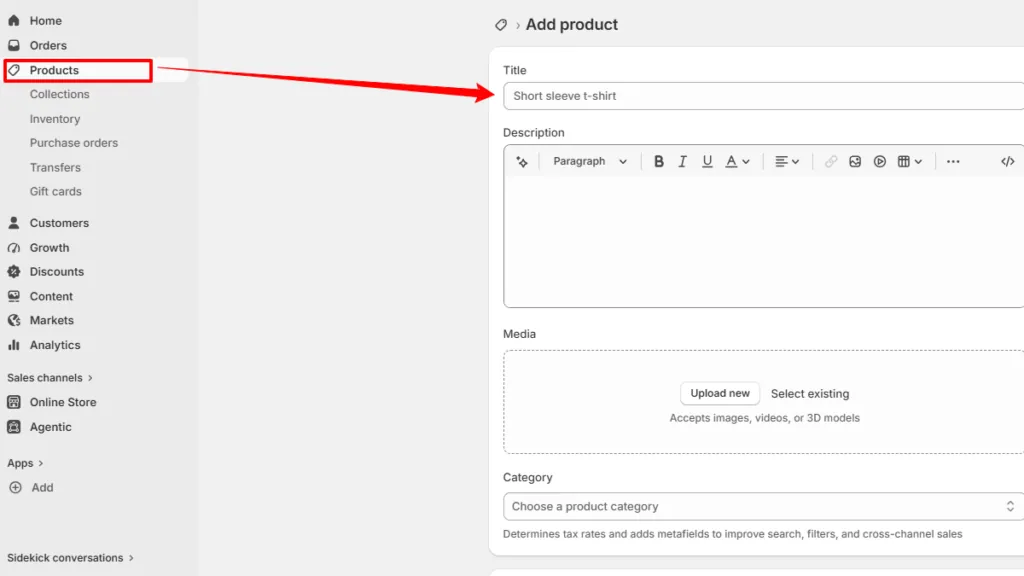
Go to Online Store > Preferences to edit the homepage SEO title and meta description. For individual products and collections, open the resource in Shopify admin and edit its search engine listing.
Shopify Theme SEO Checklist
- Use a descriptive primary heading on each page.
- Add meaningful alt text to important images.
- Keep product descriptions unique and useful.
- Ensure navigation links point to valid pages.
- Review canonical URLs and indexing behavior.
- Avoid creating unnecessary duplicate templates or thin pages.
The theme editor controls presentation, but not every SEO setting is managed inside it.
Step 14: Preview, Test, and Publish
After completing your customizations, test the storefront before publishing. Review the following elements:
- Check the homepage, product pages, collection pages, and other important templates.
- Test navigation links, search, filters, and sorting controls.
- Add products to the cart and verify quantity updates and cart totals.
- Check product variants and other purchasing options.
- Review the design on desktop, tablet, and mobile devices.
- Confirm that promotional banners and discounts display accurate information.
- Check image loading, text readability, and page performance.
- Verify that important links and SEO metadata are configured correctly.
Once everything works as expected, publish the customized theme through your Shopify admin. Keep your backup theme until you are confident that the live storefront is functioning correctly.
How to Customize a Shopify Theme Using Apps or Page Builders
Best Shopify page builder Apps like “Blocksy – Section Builder” can provide additional design options when your theme’s built-in features are not enough. Depending on the tool, you may be able to create custom landing pages, add content elements, display promotional sections, or integrate features that are not included in your theme.
Before installing an app or page builder, consider the following:
- Compatibility: Confirm that the tool supports your theme and required features.
- Customization options: Check whether it supports the specific page or element you want to change.
- Performance: Review whether it adds scripts, styles, or other resources that could affect loading.
- Mobile layout: Make sure the resulting pages work well on smaller screens.
- Maintenance: Understand whether the feature depends on the app remaining installed.
- Cost: Check recurring fees and any usage limits.
Install only the tools that solve a clear problem. Several overlapping apps can make a storefront harder to manage and may introduce conflicting behavior.
Conclusion
Learning how to customize Shopify theme settings gives you more control over your storefront’s design, content, and shopping experience. Start with the theme editor to update your branding, homepage, navigation, product pages, and collection layouts. If you need additional styling or functionality, consider custom CSS, theme code, compatible apps, or developer support.
Make changes with a clear purpose, keep the design consistent, and test the storefront on different devices before publishing. These steps help you maintain a store that reflects your brand and makes it easier for customers to browse products and shop with confidence.
Frequently Asked Questions
1. Can I Customize My Shopify Theme for Free?
Yes. You can customize many aspects of your store using the theme editor without paying for a separate customization tool. Costs may apply if you choose a paid theme, install paid apps, or hire a developer for advanced changes.
2. Can I Customize a Shopify Theme Without Coding?
Yes. The theme editor lets you make many common changes without writing code, including editing colors, fonts, images, and supported sections. Custom CSS, Liquid, or JavaScript may be needed for features outside the theme’s available options.
3. How Do I Change My Shopify Homepage Layout?
Open the theme editor and select the homepage. Add, remove, or rearrange available sections, then configure their settings and content. Review the homepage on desktop and mobile before saving and publishing your changes.
4. Can I Customize Shopify Product Pages Separately?
Yes, if your theme supports alternative product templates. You can create a separate template, customize its layout, and assign it to selected products. Remember that changes to a shared template can affect every product using it.
5. Will Customizing My Shopify Theme Affect SEO?
It can affect SEO indirectly and, in some cases, directly. Changes to headings, page content, navigation, image alt text, page speed, and mobile usability may influence how search engines understand or evaluate your pages. Keep important content accessible and test the storefront after making substantial changes.
6. Should I Edit Shopify Theme Code or Use the Theme Editor?
Use the theme editor for routine design changes and existing theme features. Edit code when you need a specific customization that the available settings cannot support. If the change affects core storefront functionality, consider working with a developer.