Multicolumn Section – Nexus
The Multicolumn section allows you to display multiple content blocks in a clean and structured layout, perfect for highlighting key features or services.
It is ideal for showcasing store benefits, guarantees, support options, or important brand values in an easy-to-read format.
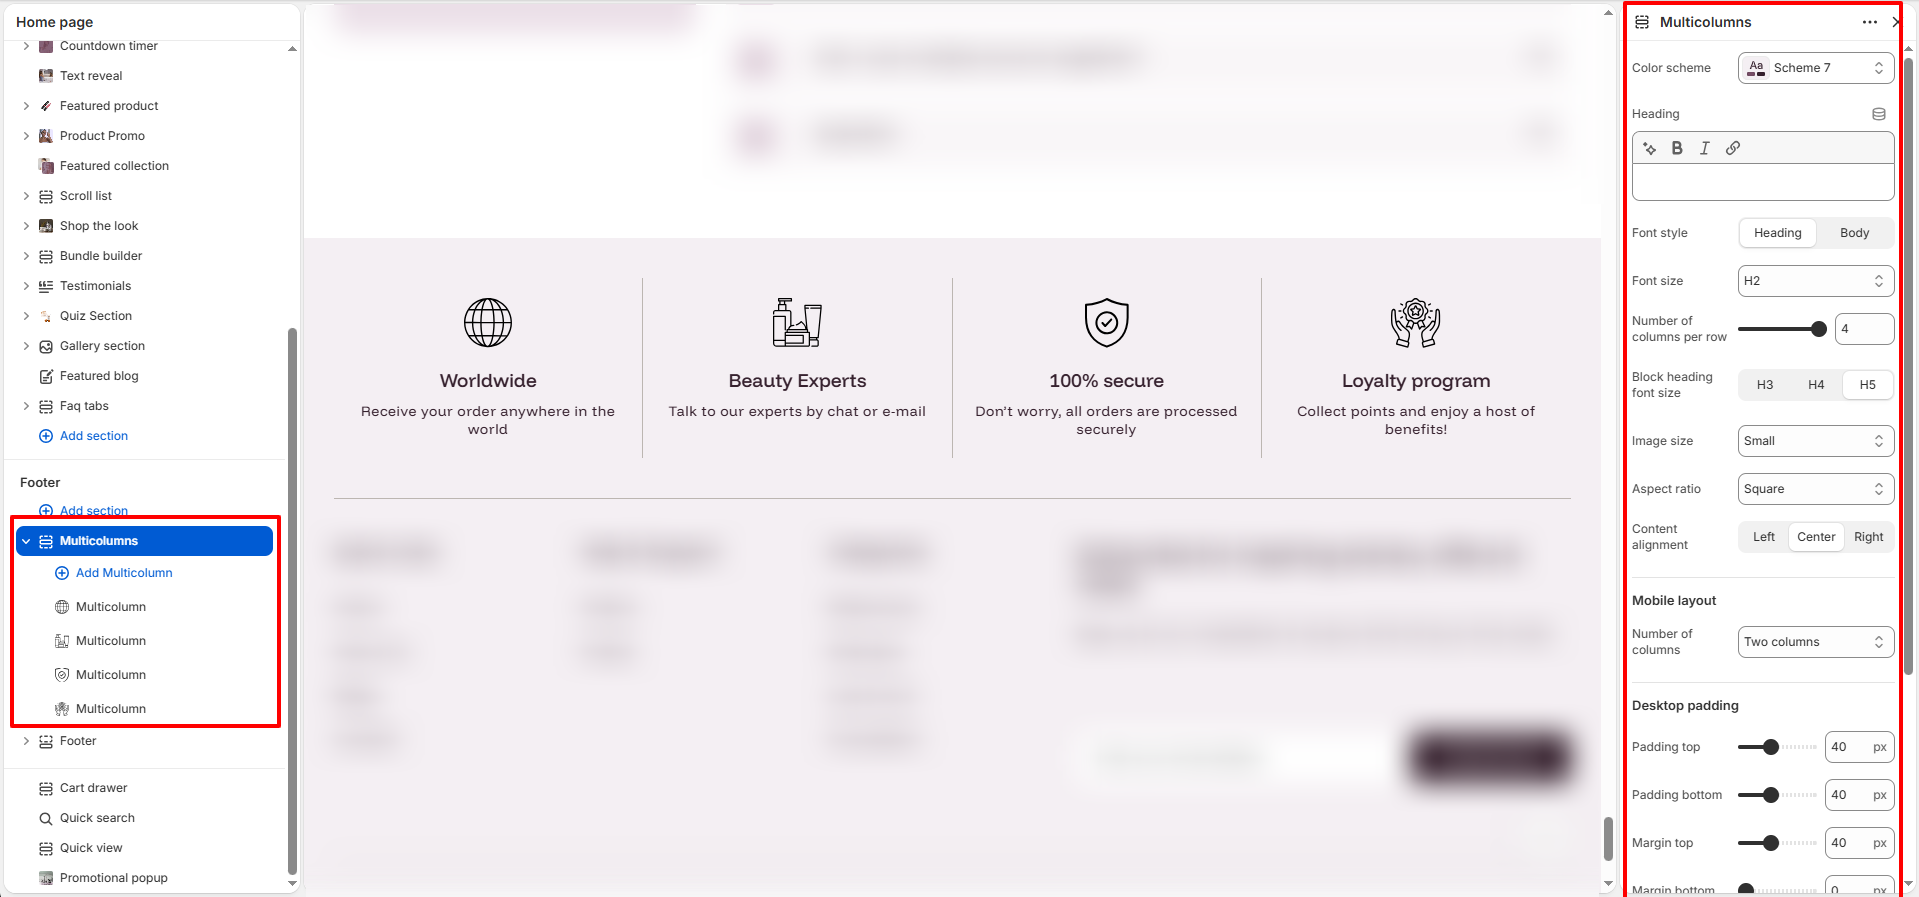
Multicolumn Section Settings:
- Color scheme: Choose a color scheme that matches your store branding.
- Heading: Add a section title using the rich text editor.
- Font style: Choose between Heading or Body font for the section title.
- Font size: Select the heading size (H1, H2, etc.) for visual hierarchy.
- Number of columns per row: Use the slider to set the number of columns displayed per row on desktop.
- Block heading font size: Select the font size for individual block headings (H3, H4, H5).
- Image size: Set the size of images or icons (Large, Medium, Small).
- Aspect ratio: Choose the shape of images/icons (Square, Portrait, Adapt to image, etc.).
- Font style: Choose between Heading and Body font styles for the section heading.
- Content alignment: Align all column content to the Left, Center, or Right.
-
Mobile layout:
- Number of columns: Choose how many columns are displayed on mobile devices (One column or Two columns).
-
Desktop margin:
- Margin top: Add spacing above the section on desktop devices.
- Margin bottom: Add spacing below the section on desktop devices.
-
Mobile padding:
- Padding top: Adjust top padding for mobile view (in px).
- Padding bottom: Adjust bottom padding for mobile view (in px).
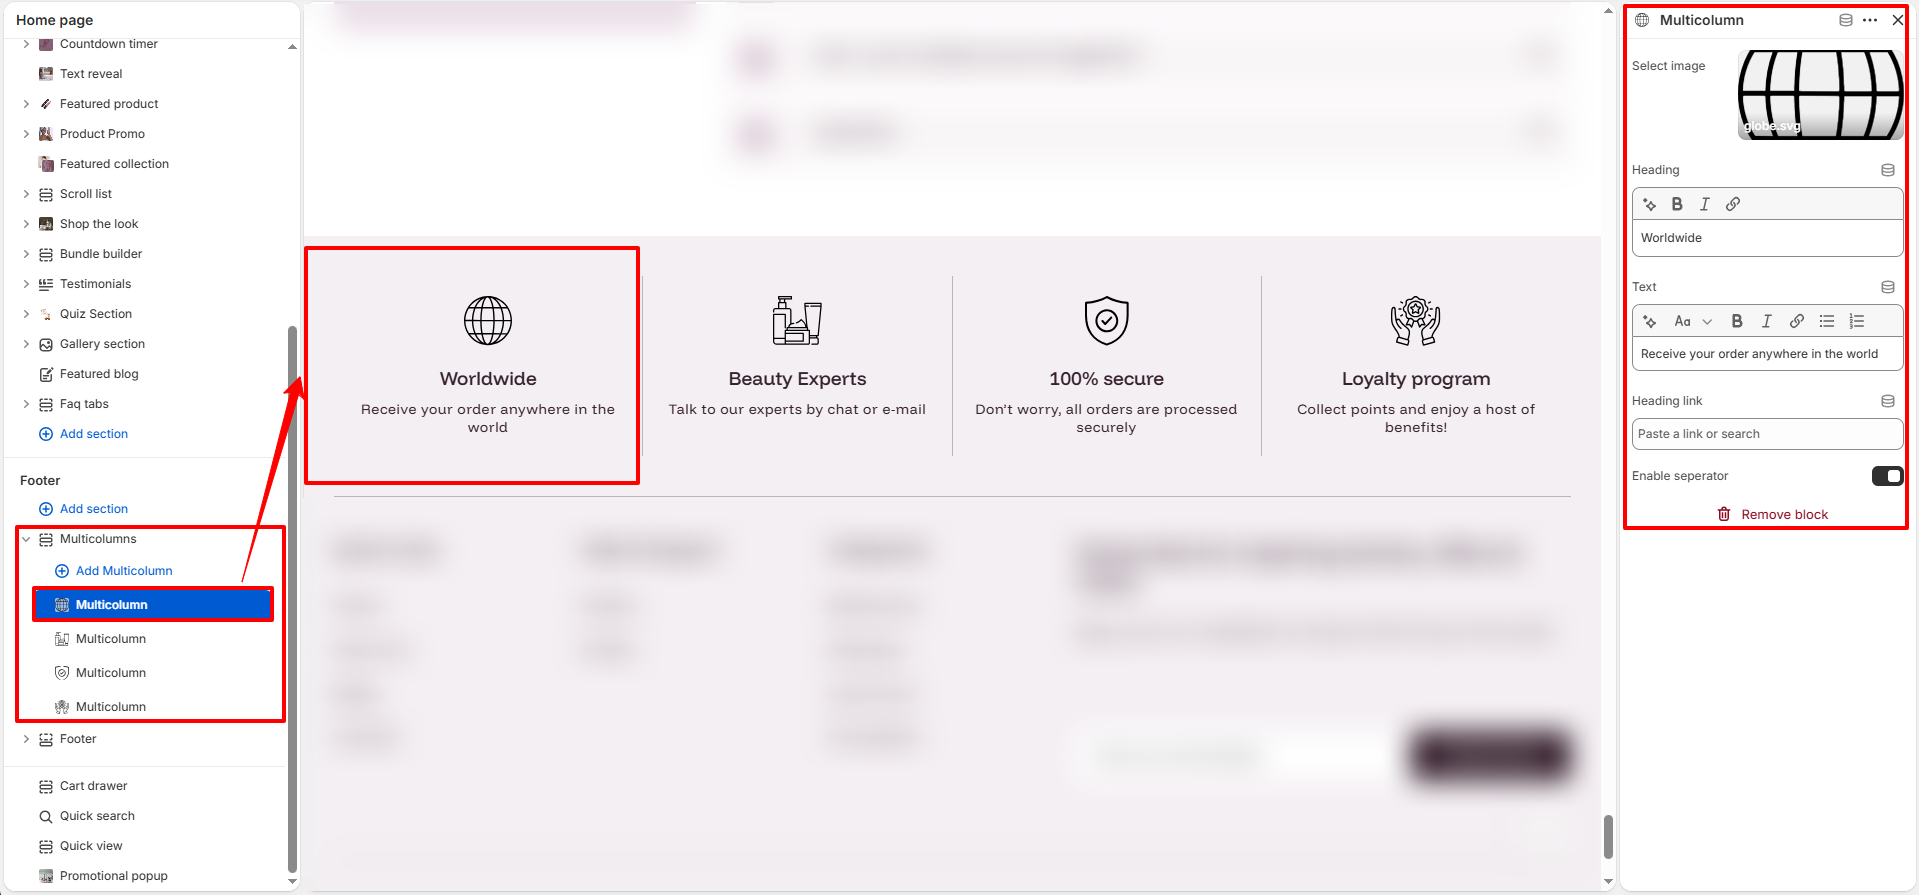
Multicolumn Block Settings:
- Select image: Upload or select an image/icon for the column.
- Heading: Add a short title for the column.
- Text: Enter a brief description or supporting content using the rich text editor.
- Heading link: Paste a link or search for a page to make the heading clickable.
- Enable separator: Toggle to show a vertical separator line between columns.
How to Set Up the Multicolumn Section:
- Go to Online Store → Themes → Customize.
- Click Add section and select Multicolumn from the section list.
- In the settings panel, configure the following.